Introduction: Why Photo Etching Defines Excellence in Thin Metal Bookmarks
When it comes to creating intricate designs with razor-sharp clarity, few techniques rival the power of photo etching. This method has become a go-to for designers, craftspeople, and engineers aiming to achieve fine details on thin metal bookmarks. Whether you’re a seasoned professional or a curious beginner, understanding how photo etching works and what makes it stand out can help you unlock a new world of creative possibilities.
What is Photo Etching? The Essentials Explained

Photo etching—sometimes called chemical etching or photochemical machining—is a process that uses light-sensitive material and controlled chemical baths to dissolve precise shapes and details into metal. Instead of cutting with tools or stamping designs, photo etching allows extremely fine lines, cutouts, and textures to be formed without deformation or burrs. This is a top choice for thin pieces like metal bookmarks, labels, and tags.
The Science Behind Achieving Fine Details
What makes photo etching so powerful for (metal bookmarks)? The key advantage is its unparalleled ability to reproduce crisp designs with lines much smaller than what most mechanical processes can deliver. Patterns are created in a photoresist, then chemically eaten away, leaving fine details that are sharp—even on metals as thin as 0.1mm. This makes it ideal for creative and functional projects where clarity and precision matter most.
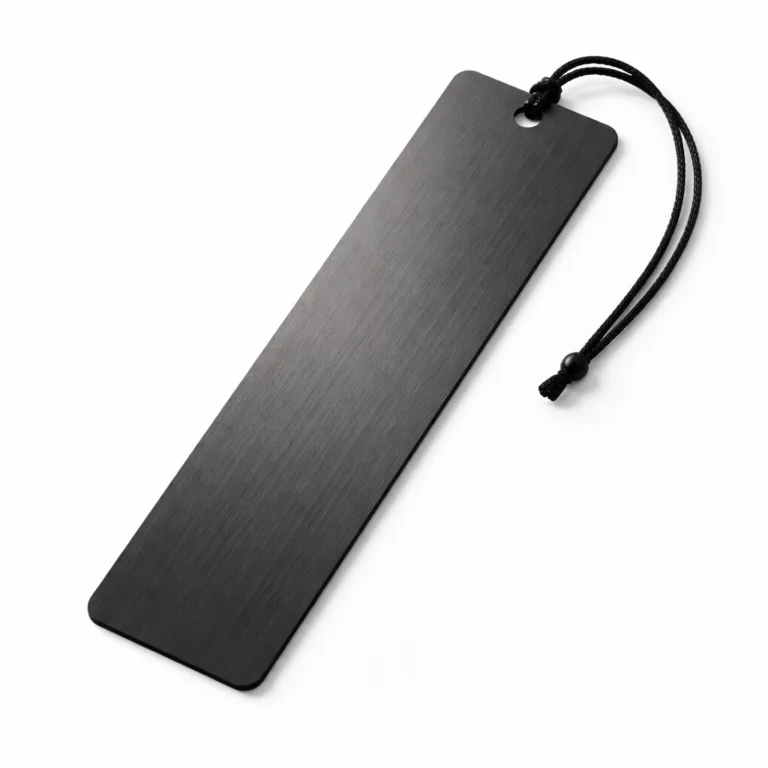
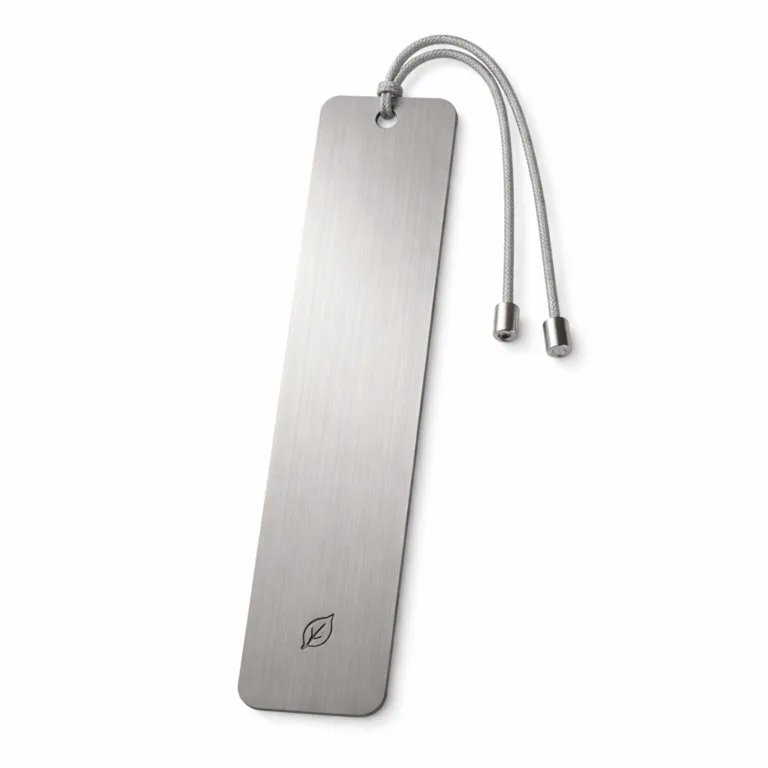
Types of Metals Used for Thin Metal Bookmarks
The material you choose impacts not just the look and feel but also the etching quality and durability. Common choices include:
- Stainless Steel – Offers corrosion resistance and strength. Popular for premium bookmarks.
- Brass – Easy to etch, with a warm golden tone ideal for antique and traditional designs.
- Copper – Malleable, with a distinctive rose hue and elegant aging (patina) over time.
- Aluminum – Lightweight, more affordable, with a clean modern finish.
Each metal responds differently to etching chemicals and finishing options. For creative or sustainable options, check out eco-friendly solutions using recycled metals.
Essential Equipment for Photo Etching
Setting up for successful photo etching doesn’t demand an entire industrial lab. You’ll need:
- UV Exposure Unit – Cures the photoresist with your design.
- Photoresist Film or Liquid – Light-sensitive coating applied to the metal sheet.
- High-Quality Transparency or Mask – Printed with your artwork, blocks UV where etching isn’t wanted.
- Chemical Bath Tray – Holds the etchant, typically ferric chloride, for controlled removal.
- Protective Gear – Gloves, apron, and ventilation for safety around chemicals.
For those advancing to production, consider how bulk manufacturing and QC affect process choices. Advice from experts (like those at UC Tag) highlights the value of stable chemistry, precise exposure settings, and batch-to-batch consistency for larger orders.
Workspace Setup: Tips for Beginners
Creating fine photo-etched bookmarks starts with your workspace layout. Here are quick-start tips:
- Ensure good ventilation when using chemicals.
- Use separate areas for clean and ‘wet’ activities (exposure vs. etching bath).
- Organize all tools—gloves, tongs, and timers—within easy reach.
- Have a water rinse or neutralizing station nearby to halt etching instantly.
Safety always comes first. Wear protective equipment and read all chemical handling guides thoroughly.
Designing for Photo Etching: Crafting Fine Details
Photo etching can resolve incredibly tiny design elements, but there are practical limits. For crisp details:
- Keep the minimum line width above 0.15mm for best results.
- Avoid large solid black areas that can undercut or lift the resist during etching.
- Use vector graphics for scalable, clean artwork.
- Test with sample pieces to refine before full production.
Artwork preparation is crucial; see the artwork preparation guide for vector formats and thickness tips.
Step-by-Step Overview: The Photo Etching Process for Bookmarks
Artwork Preparation
Print your high-contrast design onto a clear film. Vector files ensure sharp edges and accurate reproduction.
Metal Cleaning & Photoresist Application
Degrease the metal—any oil or dust will ruin adhesion. Apply a light-sensitive coating and dry thoroughly.
UV Exposure
Sandwich your design mask over the coated metal and expose under UV light. The light hits only the intended areas.
Developing the Image
Immerse in developer solution. This washes away unexposed (or exposed, depending on resist type) sections, revealing where metal will be etched.
Chemical Etching
Submerge the plate in an etchant bath (usually ferric chloride or similar). Monitor carefully to ensure precise depth and edge quality.
Photoresist Stripping & Final Cleaning
After etching, remove all resist left using a dedicated stripping solution, then rinse and dry the piece.
Controlling Detail Quality: Key Parameters
- Etch Time – Too short, and details are light; too long, and edges undercut or blur.
- Chemical Concentration – Affects speed and sharpness of the finished piece.
- Temperature – Warmer baths etch faster, but can cause over-etching if not controlled.
- Agitation – Gentle movement ensures even action for consistent line depth.
Repeat tests with scrap metal or sample runs to dial in your settings. For manufacturing runs with consistent results, specialists like UC Tag track variations in batch temperatures, chemical age, and agitation patterns to ensure every bookmark is as crisp as the last.

Comparing Photo Etching to Other Finishing Methods
| Method | Detail Fineness | Edge Quality | Best For |
|---|---|---|---|
| Photo Etching | Very High (0.1–0.2mm lines) | Smooth, no burrs | Intricate thin bookmarks |
| Die Stamping | Moderate | Possible distortion on thin stock | High-volume simple shapes |
| Laser Engraving | High (0.3mm+) | Heat-affected edges | Personalized items, thick metals |
| Chemical Milling | High for larger features | Smooth | Structural parts |
For bookmark-size metal pieces, photo etching is favored where design intricacy and consistent edge quality are required.
Plating, Color, and Finishes for Etched Bookmarks
Once you’ve etched your design, the piece may be further enhanced by:
- Electroplating – To apply gold, silver, black nickel, or color finishes.
- Enamel Filling – Adds color within recessed areas for contrast and legibility.
- Antique or Brushed Finishes – Adds depth or softens the surface for a tactile feel.
For a comparison of finishes, learn about soft vs. hard enamel methods and how each affects bookmark look and feel.
Common Design Mistakes (And How to Avoid Them)
- Lines that are too thin (<0.1mm) risk being washed out—test before mass producing.
- Text smaller than 1.0mm tall can lose readability; favor bold fonts for best results.
- Over-complicated designs cost more and prolong etching time—simplify without sacrificing creativity.
Creative Applications: Beyond the Classic Bookmark
Photo-etched metal isn’t just for classic rectangular bookmarks. Inventive makers experiment with:
- Custom shapes (leaves, feathers, abstract patterns)
- Cut-outs and filigree for lace-like effects
- Personalization, such as initials or custom artwork
- Business or event branding for memorable giveaways
Need ideas for branching out? The custom metal logo tag guide delivers plenty of crossover inspiration for bookmarks, bag tags, and more.
Artist Spotlight: Voices and Techniques from the Field
Many artists and micro-brands have developed signature styles through photo etching. Some favor minimalism, focusing on geometric cut-outs or symbolic forms, while others push the limits with multi-layer art that plays with light and shadow. Reaching out to fellow creators for advice—or even interviewing artists—can reveal tricks like stacking thin metal or combining etching with laser scripting for truly unique pieces.
Safety and Environmental Considerations in Photo Etching
Safe and eco-conscious etching is critical. Many traditional etchants are corrosive and must be disposed of responsibly. Consider options like recycling spent metals and using less hazardous chemicals. For those prioritizing sustainability, you’ll find actionable insights in the article about eco-friendly processes and low-VOC finishes.
Material Thickness Matters: Balancing Strength & Detail
How thin is too thin for a bookmark? Typically, 0.2mm to 0.5mm balances flexibility and durability. Going thinner risks bending, while thicker stock can lose delicacy. If unsure, review the gauge comparison guide for metal tags for practical examples in a variety of applications.
Attachment Features: Holes, Tassels, Sleeves, and More
Beyond the aesthetic, features like rounded corners, punched holes, and welded loops make bookmarks user-friendly while preventing sharp snags. Some creators add ribbon slots or magnetic backs for enhanced functionality. Detailing these elements at the design stage streamlines manufacturing and safety checks.
Quality Control: Ensuring Sharpness and Consistency
From hobby to batch production, consistent checks are vital. Focus on:
- Edge smoothness—no burrs or sharp corners
- Clean and complete pattern transfer
- Uniform plating and finish, free from stains or pits
- Accurate dimensions
Manufacturers like UC Tag conduct multiple visual and tactile inspections throughout production to mitigate batch variation and deliver trust-worthy results.
Photo Etching: Achieving Fine Details on Thin Metal Bookmarks
To summarize, photo etching unlocks new creative possibilities for metal bookmarks—and nowhere is that more apparent than when you see the fine details it delivers up close. By balancing carefully selected materials, accurate design, controlled etching, and advanced finishing, you can create both artful and functional pieces that stand the test of time.
Conclusion: The New Standard for Detailed Bookmarks

Photo etching has shifted the boundaries of what’s possible with thin metal bookmarks. This process keeps fine lines razor-sharp, ensures repeatable quality, and enables creative freedom unmatched by older methods. For anyone passionate about combining artistry with precision, mastering photo etching opens the door to bookmarks that are both beautiful and enduring. Experiment, test, and push your ideas—you’ll find the rewards as lasting as the metal you etch.
Frequently Asked Questions
What metals are best for photo etching thin bookmarks?
Stainless steel, brass, copper, and aluminum are popular due to their stability, etching speed, and attractive finishes. Each offers a different aesthetic and mechanical property.
How thin should metal be for bookmark etching?
Between 0.2mm and 0.5mm is ideal. This gives structural strength while enabling intricate designs. Thinner metals can distort; thicker ones lose elegance.
Can photo etching capture tiny text and patterns?
Yes, with proper artwork preparation and process control, text as small as 1mm and lines down to 0.15mm are reliably achieved with photo etching.
Is photo etching safe to do at home?
It can be, if you follow safety measures: use gloves, goggles, work in a ventilated area, and neutralize or dispose of chemicals responsibly after use.
What are the benefits of photo etching over stamping?
Photo etching provides finer details, eliminates burrs, and avoids metal distortion, especially on thin materials—stampings may deform or lack sharpness on comparable pieces.
How can I add color or finish to etched bookmarks?
Enamel filling and electroplating are common. You can plate with gold, nickel, or black finishes for contrasting effects or fill recessed areas with durable colored enamel.
Related Reading
- Soft vs. Hard Enamel: How to Choose the Right Finish for Metal Details
- 7 Essential Tips for Selecting Metal Thickness in Tag Projects
- Master the Art of Perfect Etchable Artwork: A Vector and Line Weight Guide
- Eco-Friendly Metal Bookmarks: Transform Sustainability with Recycled Metals
- Custom Metal Logo Tags: Inspiration for Creative Applications
- Sustainable Metal Finishes: Eco-Friendly Practices Everyone Can Use